












Photo to print
From a product photo to a 3D printable model
Follow one porcelain cup photograph through a generated 3D model and a prepared STL. Check the hidden geometry, physical size and sliced layers before a test print.
One photograph, model and prepared STL
Porcelain cup: photograph to 3D
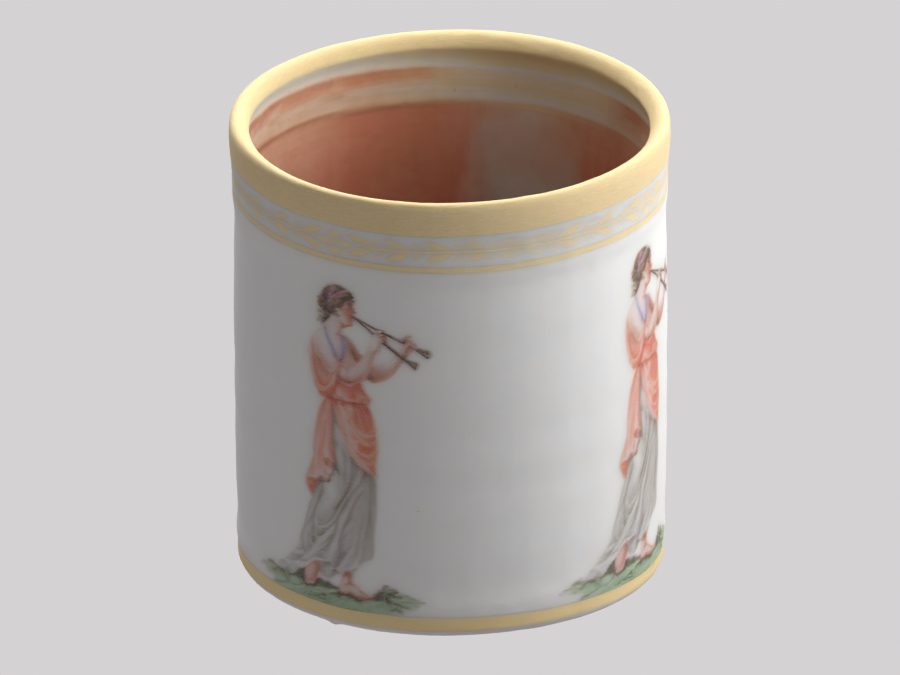
Tripo H3.1 · 80 mm longest dimension
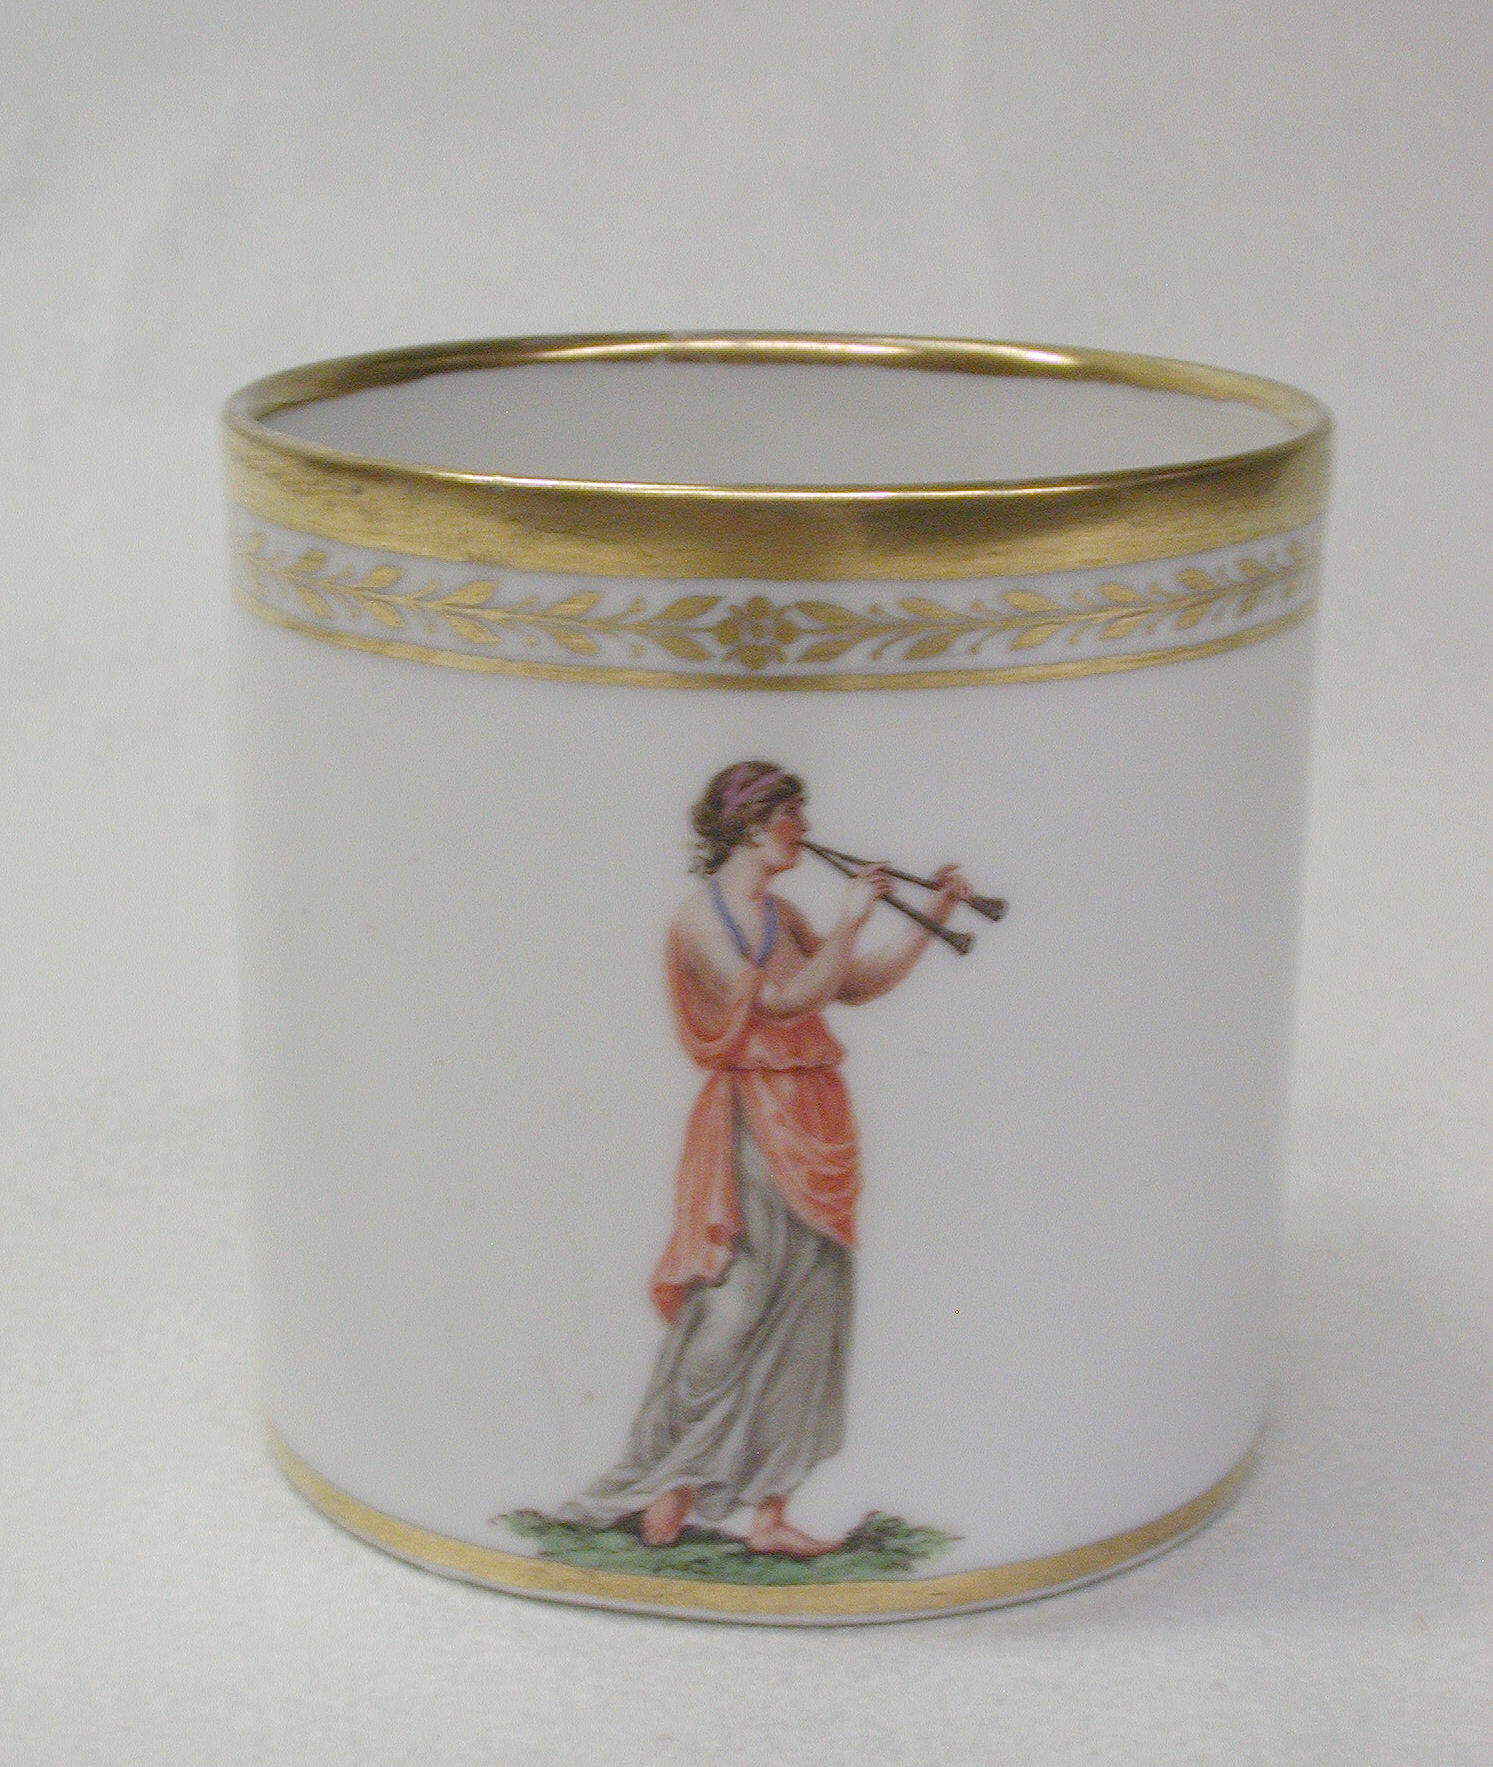
Source photo: The Metropolitan Museum of Art · CC0 1.0. Model generated in Quady3D.
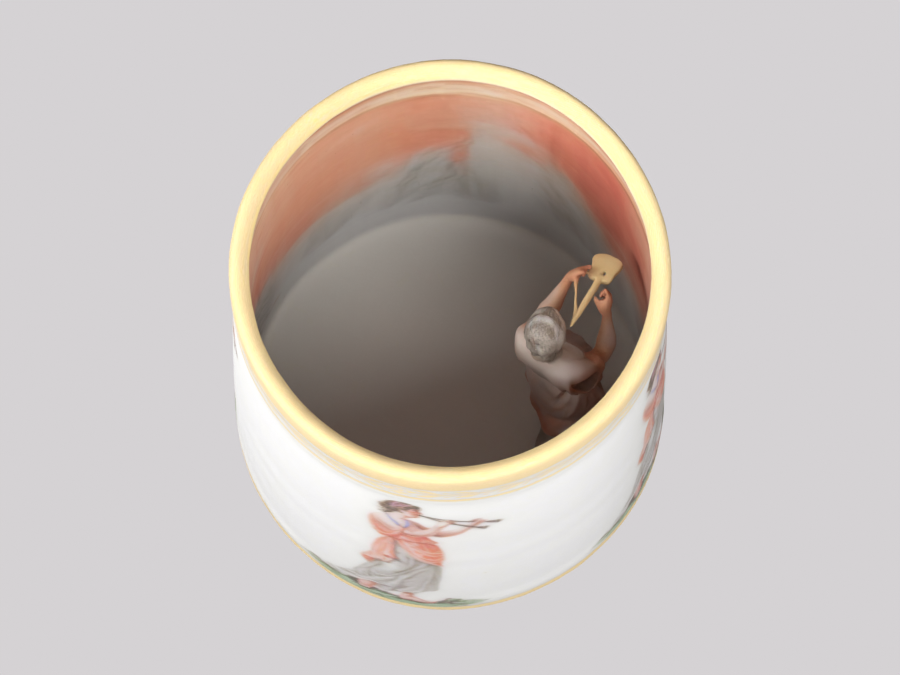
Compare the rim and decoration with the photo. The interior contains repeated decoration; the far side and exact dimensions need separate review.
72.89 × 73.2 × 80 mm (file axes) · 47,326 triangles · Geometry export; review in a slicer before printing.
Inspect the inferred interior and back
1. Start with a photo you can compare
The source shows a porcelain cup with a gold rim and painted decoration. It is an actual museum photograph, not a generated product illustration. Keep the original image so you can compare the model’s silhouette and surface details.
3. Choose dimensions before export
This inspection example scales the model to an 80 mm longest dimension and exports its geometry as STL. That size was chosen for this example; it is not a recovered measurement of the photographed cup.
4. Check the shape that will be printed
STL does not carry the gold rim or painted texture. Inspect the actual geometry for holes, isolated pieces, intersections and thin walls. Edit the mesh where needed rather than assuming that conversion repairs it.
5. Open the STL with a specific print profile
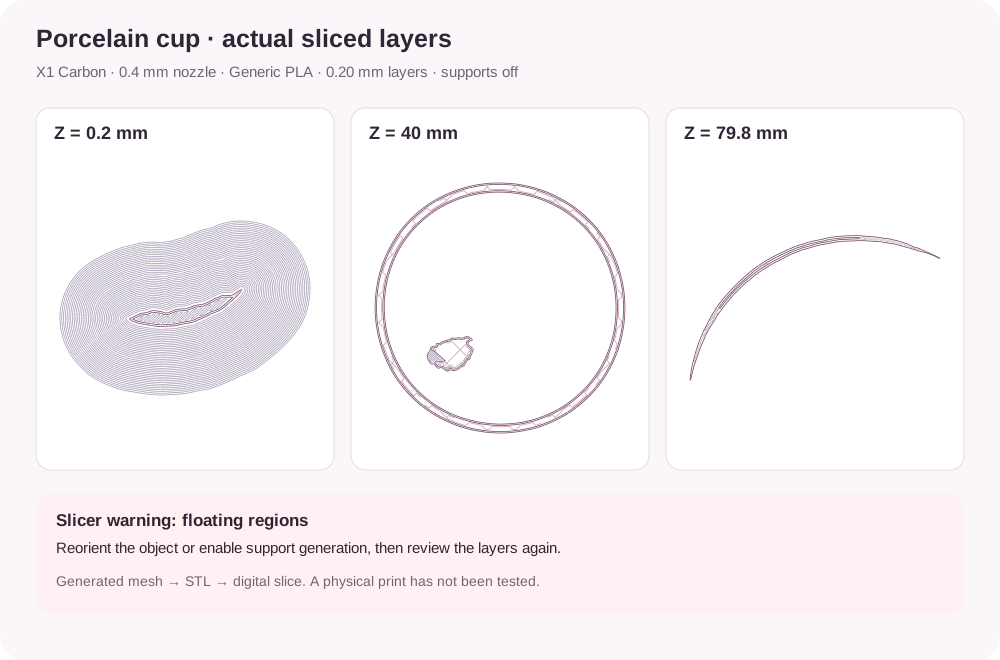
We sliced this STL in BambuStudio with an X1 Carbon 0.4 mm nozzle profile, Generic PLA and 0.20 mm layers. With supports disabled, the slicer flagged floating regions. Adjust orientation or generate supports, then review the layers again. This example has not been physically printed.
6. Review layers, then test the important details
Inspect layer previews around the rim, interior and narrow features. Start with a test that checks the details you care about, then adjust the mesh or settings using the physical result.